
In today’s connected world, a robust internet connection is no longer a luxury; it’s a necessity. While Wi-Fi offers unparalleled convenience, it often falls short when it comes to raw speed and unwavering stability. For mission-critical tasks, high-bandwidth streaming, or competitive online gaming, a wired Ethernet connection remains the gold standard. It delivers a consistently faster and more reliable experience.
Many homeowners seek to optimize their network. Perhaps you want to move your router for better signal distribution. Maybe you’re setting up a sophisticated mesh Wi-Fi system and need wired backhaul for peak performance. Or perhaps you’re installing an EV charger that benefits from a direct, stable link. In all these scenarios, physical cables are superior. However, the thought of unsightly wires snaking across your floors can be a major deterrent. This comprehensive guide will walk you through everything. We’ll cover choosing the right cables, meticulous planning for your routes, and effective strategies for discreetly hiding everything. The goal is a high-performance network that is both powerful and aesthetically pleasing.
It’s important to note that while we champion wired connections here, we also recognize the importance of optimizing your wireless setup. If running cables isn’t feasible, explore our guides on making your Wi-Fi faster, troubleshooting common issues, and reviews of the best mesh routers, Wi-Fi routers, and Wi-Fi extenders.
Understanding the Speed Equation: The Weakest Link Principle ⚡
Before diving into cable specifics, let’s clarify a fundamental truth about network speed. Your overall internet experience is always capped by your incoming internet service provider (ISP) connection. If you subscribe to a 1-Gigabit-per-second (Gbps) plan, your interaction with the internet will never exceed that speed. This is a crucial distinction to remember.
However, the story changes when discussing your internal network performance. Moving files between devices on your local network, such as from your PC to a network-attached storage (NAS) drive, can be significantly faster with higher-rated gear. This is where the concept of the ‘weakest link’ becomes paramount. Every component in your wired network chain must be rated for the same speed to achieve optimal performance. This includes the Ethernet port on your router, the cable itself, any Ethernet switches you use, and the Ethernet port on your PC or other connected device. If any single component is slower than the others, it will bottleneck the entire connection. Investing in faster cables and switches makes sense for future-proofing. Even if your ISP speed is currently 1 Gbps, a 10 Gbps internal network prepares you for future ISP upgrades and ensures lightning-fast local data transfers.
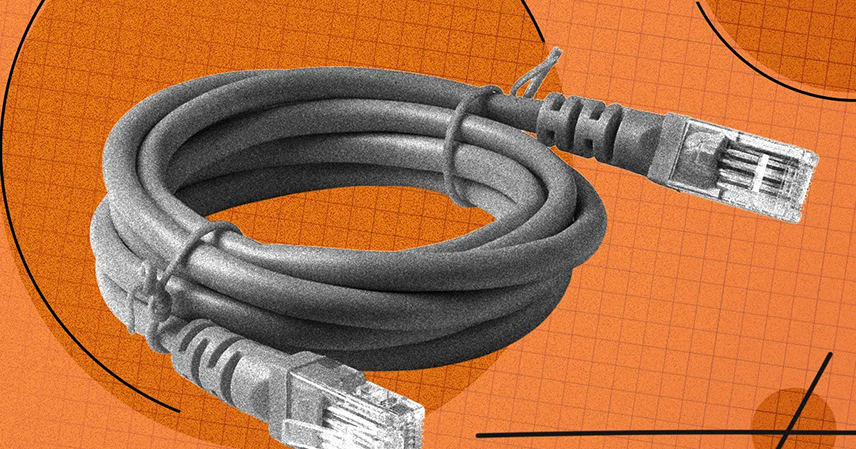
Decoding Ethernet Cable Categories and Features 🧐
Choosing the right Ethernet cable is simpler than it seems, and it doesn’t require breaking the bank. While I delve into greater detail in my dedicated Ethernet guide, here are the essential factors to consider for your home setup.
Category (Cat) Ratings: Ethernet cables are classified into categories that dictate their maximum bandwidth and data transfer rates. For most homes, Cat 5e or Cat 6 cables are sufficient, supporting speeds up to 1 Gbps. However, for your main runs, especially from your router to a primary switch, I strongly recommend opting for Cat 6a or Cat 7 cables. These cables are engineered to handle speeds up to 10 Gbps. The price difference between Cat 6 and Cat 6a/7 is often minimal. This small upgrade provides significant future-proofing, ensuring your infrastructure can handle increased network demands down the line. Cables like Cat 7a or Cat 8, capable of 40 Gbps, are generally overkill and considerably more expensive for the average residential user. Their benefits are rarely realized in a home environment.
Shielding: Most common Ethernet cables are Unshielded Twisted Pair (UTP). This means their internal wire pairs are twisted together and encased in a simple plastic jacket. Some cables, however, feature metallic or foil shielding, known as Shielded Twisted Pair (STP) or Foiled Twisted Pair (FTP). You typically only need to consider shielded cables if your runs are placed alongside major power lines, fluorescent lights, or other significant sources of electromagnetic interference (EMI). Shielded cables are less flexible. They can also be more susceptible to damage if not installed correctly. For the vast majority of home installations, UTP cables are the preferred choice due to their flexibility and ease of handling.
Cable Shape: I advise against using flat Ethernet cables. While they might seem convenient for discreet placement, their design makes them more vulnerable to interference. The consistent twist rates within round cables are crucial for noise rejection, a property often compromised in flat designs. Anecdotally, I’ve observed more issues with flat cables compared to standard round ones. Regardless of shape, it’s always vital to prevent sharp kinks or heavy foot traffic on any cable. Such stress can degrade performance and shorten the cable’s lifespan.
Strategic Planning for Seamless Integration 🗺️
A successful wired network installation hinges on thorough planning. Rushing this stage can lead to frustrating reworks and suboptimal performance. Start by clearly identifying your needs. Determine which devices require a wired connection and their exact locations. Consider your router’s central position and the path to any Ethernet switches or end devices.
Do You Need an Ethernet Switch? Your router typically has a limited number of Ethernet ports, usually four. If you need to connect more than a few wired devices, an Ethernet switch is essential. A switch expands your network’s capacity, allowing multiple devices to share a single connection from your router. For most home users, an unmanaged switch is perfectly adequate. These are plug-and-play devices that simply extend your network. Ensure the switch’s port speed matches or exceeds your cable’s capabilities to avoid creating a new bottleneck.
Next, meticulously plan your cable routes. Sketch out a diagram of your home, marking all connection points and potential pathways. Measure the distances carefully, always adding extra slack for future adjustments or minor rerouting. Account for obstacles like doorways, windows, and structural elements. Safety is also paramount; avoid running cables near heat sources or in high-traffic areas where they could be tripped over or damaged. Pre-planning saves time and ensures a smooth installation.
Label Your Cables: This step is often overlooked but is incredibly important. As you run each cable, label both ends clearly. Use adhesive cable labels, color-coding, or even a permanent marker if the cable jacket allows. Indicate the cable’s destination (e.g., ‘Office PC,’ ‘Living Room TV,’ ‘Mesh Backhaul’). This simple practice will save you immense frustration during future troubleshooting, upgrades, or when simply trying to identify which cable goes where. A well-labeled network is a manageable network.
Mastering the Art of Concealment: Hiding Your Network Infrastructure 👻
Once your cables are chosen and your routes are planned, the final step is to make them disappear. A clean installation enhances aesthetics and protects your cables from damage. There are several effective methods, ranging from simple surface-level solutions to more involved in-wall installations.
Along the Baseboard: This is one of the easiest and most common methods. You can secure cables along the top edge of your baseboards using small adhesive cable clips or discreet cable nails. Choose clips that match your wall color, or paint them for a truly seamless look. This keeps cables off the floor and out of sight without major modifications.
Under Carpet or Rug: For areas with carpeting, you can tuck flat cables (with caution regarding durability) or thin round cables under the edge of a carpet or rug. Specialized cable protectors or channels are also available that can be placed over cables in high-traffic areas, preventing damage and tripping hazards. Always ensure the cable lies flat and doesn’t create a noticeable bump.
Use Cable Raceways/Concealers: Cable raceways are channels, often made of plastic, that adhere to walls or ceilings. They come in various sizes and shapes, including paintable versions that can blend perfectly with your decor. Some are designed to fit neatly into corners. They offer excellent protection and a very clean look, making them a popular choice for visible runs. Installation is usually straightforward, involving adhesive backing or small screws.
Use Crown Molding: For a more integrated and premium look, consider running cables behind existing crown molding or installing molding designed with a cable channel. This method requires more effort and potentially some carpentry skills. However, the result is a completely hidden cable run that enhances the room’s aesthetic. You might need professional help for this option.
Behind the Wall or Under the Floor: This is the most aesthetically pleasing option, providing an invisible network. It involves running cables through wall cavities or under floorboards. This method requires tools like fish tape, wall plates, and low-voltage mounting brackets. It’s a more involved DIY project. Exercise extreme caution to avoid electrical wiring, plumbing, or structural elements. If you’re uncomfortable with this, hiring a qualified electrician or low-voltage installer is highly recommended.
Hiding Switches and Power Strips: Don’t forget the supporting hardware. Small Ethernet switches and power strips can also be eyesores. Consider mounting them behind furniture, inside media cabinets, or using dedicated cable management boxes. Ensure that any enclosed switches have adequate ventilation to prevent overheating. Keeping these components out of sight completes the professional look of your new wired network, providing the perfect environment to utilize high-performance devices to their full potential.
Key Insights: Crucial Takeaways for a Robust Network 💡
- Prioritize Wired Connections: For maximum speed, stability, and reliability, always opt for Ethernet over Wi-Fi, especially for critical devices and high-bandwidth applications.
- Future-Proof Your Infrastructure: Invest in higher-category cables like Cat 6a or Cat 7 for your main runs. This minimal upfront cost ensures your network can handle future speed increases and evolving technological demands.
- Strategic Planning and Labeling are Paramount: Meticulously plan your cable routes, measure precisely, and most importantly, label both ends of every cable. This prevents headaches during troubleshooting and future upgrades.
- Concealment Elevates Aesthetics and Protects: Utilize methods like baseboard clips, raceways, or in-wall installations to hide cables. This not only improves your home’s appearance but also safeguards your network from accidental damage.
- Don’t Forget the Supporting Hardware: Discreetly manage Ethernet switches and power strips. Ensure they are hidden but also properly ventilated for optimal performance and longevity.
Source: How to Run Ethernet Cables to Your Router and Keep Them Tidy